

Only a few supplies are needed for this project and it's a fairly simple assembly!
All of my supplies were purchased from the $1 store:
Glass vase with flared rim
*Styrofoam (ball shape is preferred)
*Suckers
Hot glue
Embellishments (optional)
I created a '50 SUCKS' flower tag with scrapbook paper attached to a skewer and used silk florals that I already had on hand
*The size of your styrofoam ball will determine the amount of suckers you will need. I ended up using a little over 50 suckers also using the flowers and smaller suckers to fill in gaps. The widest part of your styrofoam ball should be a little larger than the circumference of the rim of your vase. You're typically safe with about 50 - 70 suckers.

Directions: Fill your vase first--for weight and aesthetic purposes. I chose to use a few lollipops. Cut your styrofoam ball in half and press it down onto the rim of the vase with a little hot glue on the edge to keep it secure. All that's left is to start adding your suckers! I assembled mine in rows, working with the bigger suckers on the bottom moving my way up--and adding the smaller ones last to fill the gaps. If you don't plan to eat the suckers in the near future, you can use hot glue to really secure them--I chose not to do this. I added my sign to the top, used a few orange silk flowers to fill bigger gaps and help with the shape of the arrangement, and used the leaves from the flowers at the bottom of the bouquet to give it a more 'floral' look.

If using a glass/clear vase, note that pieces of styrofoam will fall into the bottom of your jar while creating your bouquet. If you want to avoid seeing this, use either a colored vase or any other type of container/jar that isn't see-through. Since my lollipops had white sticks the small bits of styrofoam were hardly noticed.
Denise has a small video tutorial on how she makes her arrangements; you'll notice that I made mine quite differently and I'm sure there are many variations you can come up with based on your supplies on hand and the size of bouquet you want to achieve!
Here is my aunt with her bouquet--she was over-the-top excited for it and everyone got a kick out of it!

To celebrate my aunt's 50th birthday we got a lot of our family together and had one big party. The celebration was in part a Gator party as well since it was game day and my family are huge fans. What better way to dress up for a sports team than with hair bows? I made enough hair accessories for all the girls to represent the orange & blue!


Over time I have found that satin ribbon works best for the base of creating simple bows; both sides are the same color, it is easy to work with and makes the perfect bow shape without a lot of effort! Add a few smaller contrasting ribbon bows, a center embellishment and a clip to the back and you're all set!
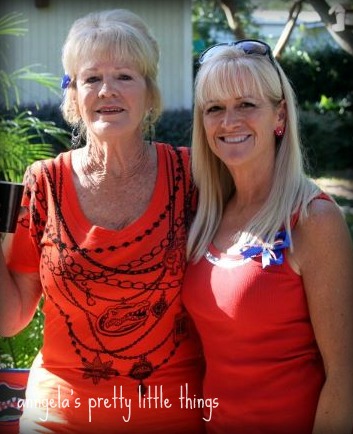
Here are a few of us girls on the big day:
 |
| Kim with her hair bow and Gator gear |
 |
| Tia wore a headband and my aunt pinned one to her tank |

 |
| My nana even had a clip in her hair :) |
The sucker boquet and ribbons were a huge hit at the party! I can't wait for the next opportunity to make another bouquet as it was a fun, quick and simple project. Who's birthday is next?? :) :)


