Showing posts with label tutorial. Show all posts

Thursday, January 19, 2012

Babies 1st Birthday *no sew* Tutu Dress {Tutorial}

Remember this onesie dress I made for a close friends baby shower just over a year and a half ago? 


Some months ago, Ms. Peyton finally grew big enough to fit in it. How adorable and perfect does she look? It puts a huge smile on my face when I get photos of little ones wearing their dresses that I create.


The big milestone was coming up for little Peyton; her first birthday. Her parents asked if I would like to make her birthday outfit--and of course I totally agreed to! They gave me free reign in designing it. Oh, the options!! After getting the ok with mom, I knew I wanted to go for a tutu dress. Mom said go all out--pink and girly. I told her she would not be disappointed!

I found this SUPER helpful tutorial on cutting the tulle for the skirt and this tutorial for creating the actual skirt using slip knots; both are from Angie at Treasures for Tots. She has a lot of tips for creating these cute outfits. After some googling and bloghopping I decided to make a 6.25" skirt for Peyton. Most baby tutus are made anywhere from 6"-8" in length but even at 12 months, little Ms. Peyton was still wearing 6-9 month onesies, so I didn't want the skirt to be TOO long. In the end, a 6.25" skirt worked perfectly, with my cardboard cut at exactly 12.5". (Jo-Anns will give you their cardboard pieces that they wrap their fabric with--I always keep a stash of these as they come in handy for many projects!)

I really wanted a multi-pink effect and some sparkle; I used two different shades of pink with the lighter one being a shimmer 'finish.' 
You can see the lighter pink has a shimmer effect compared to the 'matte' dark pink tulle
For some strange reason the first time I make something new I ALWAYS get nervous. Either that it won't work, it won't come out right, or that I did something wrong. I got very excited once the skirt started taking shape from just the very beginning. The pattern I used with my colors was simple; I rotated using 2 pieces of each color tulle. I didn't want a striped look, but I wanted a dimensional look--this worked perfectly.


My tutu skirt came along perfectly. In the meantime, I had also fell in love with these 'necklace shirts' I saw on Pinterest. They are just so girly and adorable and I thought it'd be the perfect compliment to the tutu for Peyton's dress. I used a white onesie and pink fabric paint. I hand-drew the individual pearl strands rather than using a 'stencil' and it turned out wonderfully; a little more work, but the finished product was totally worth it. The paint dried fairly quickly and the color was perfect. Again, it was the first time I had used fabric paint in a long time, so I was nervous. The one tip I'd recommend is to definitely have a surface on the inside of the onesie so the paint doesn't bleed through to the back...not that I had to make an entire second onesie or anything. ;)

Along with the dress I made a tulle flower to pin onto the pearl strands of her onesie (similar to those in the necklace shirts) but Peyton wasn't a fan and kept pulling at it so we had to take it off--thankfully I didn't sew it onto the onesie! She also had an adorable pink bow for her hair which she refused to keep in. BUT, of all the things she totally loved the tutu and had no issue with strutting her stuff in it her entire birthday! This was the main thing her mom and I was worried about--that she would pull and fuss with the tutu, but she had no problems with it. Maybe she knew how cute she looked. :) Keeping it tied in a simple bow was all it needed to stay up on Peyton throughout the day.


She did everything from opening her presents, to riding her pony to playing with her new toys in her tutu! The only reason we had to take it off was for her cake; no one wants a dirty birthday dress!


I definitely recommend making these skirts for birthdays, costumes or for photo shoots.  
They are totally affordable, easy to make, customizable and SO cute!
Maybe oneeee day I'll be able to make these for a little girl of my own. :)
signature

Wednesday, December 21, 2011

Curled Paper Ornament {Tutorial}

So I saved this pretty awesome DIY ornament on Pinterest months ago. I know there are MANY variations on this idea out there but Christy's takes the cake in my book. Finally it's Christmas time and I have JUST the couple to make one of these for; the same friends who I created a handmade canvas for as their wedding gift, which by the way is hanging beautifully in their bedroom. Christy called this her 'Wedding Invitation Ornament' and though I used a wedding invitation for the ornament I made, I'm going for the 'Curled Paper Ornament' title because the possibilities are endless on this one. Between my second mom and I, we thought of over a handful of ornaments that could be made using this same technique; a baby's first birthday, a mini time capsule of events and outings, a milestone birthday, a vacation to remember...The idea is simple. Use paper that represents an event (doesn't necessarily HAVE to be an invitation--think scrapbook paper, clipart images, words, phrases, postcards, menu's, etc.) cut it into strips, curl the strips, then fill up an ornament and embellish!


I think I went just a little overboard and took a photo of almost every step which probably wasn't necessary. And since I've already summarized the concept above, this will be a picture tutorial.

Enjoy!!


It's fun because when you shake and twist the ornament you get different views of the bride and groom names, the venue and date, etc.


Add stickers, ribbon, charms...anything you'd like to embellish the theme you are going for!


Tuesday, December 13, 2011

Peacock Ornament {Tutorial}


I recently participated in a handmade ornament tutorial showcase with Sew Woodsy. In case you missed any of the 12 fabulous handmade ornaments brought to you by various bloggers for the '12 Days of Handmade Ornaments' stop on by here to see them all! There are some really neat ideas created by the lavely ladies who participated!


For my ornament, I wanted to do something different and fun, bright and colorful and something you don't see every day but almost anyone would love...meet the Peacock Ornament! She really sparkles and looks gorgeous hanging on a tree! This is a super simple ornament that almost anyone can make.


SUPPLIES
(not all supplies are pictured)

Plastic fillable ornament
Recollections extra fine 'Marine' blue glitter
Scissors
Mop & Glo Floor Shine Cleaner
Peacock feathers 
Scrap piece of blue felt (please disregard to the green piece I have pictured)
Blue fluffy feather
1 orange bicone jewelry bead
Grey flat back crystals
Hot Glue

All of the above items can be purchased at Michaels craft store with the exception of the Mop & Glo. The peacock feathers were in the floral section with 5 feathers on a long stem. Any blue feather can be used for the peacock's head; I cut a small fluffy blue feather from a larger feather 'stick' found in the floral section. You can see the feather 'stick' in the supplies photo on the top right corner.


Now that you have all your supplies, let's get started!
 
Step 1. Squirt some Mop & Glo into your ornament. Gently swirl the product around in the ball to get an even coat all around the inside. Try not to create too many bubbles. Be sure to coat the neck of the ornament as much as you can as well. After the entire ornament is coated pour any remaining product back into your Mop & Glo bottle.
Step 2. Fill glitter into your ball. I used a piece of paper as a make-shift funnel. Tilt and swirl your ornament to get a nice, even coverage. You may have to pour glitter numerous times to fill the entire ornament. This step doesn't require near as much glitter as it seems!
Step 3. Once your ornament is evenly covered pour another small amount of glitter into the ball, cover the opening and shake the glitter to coat the neck of the ornament as best as you can. Pour any excess glitter back into your container.
Step 4. One glitter ornament complete!
Step 5. Arrange your feathers on a flat surface just as you would like them to show on your ornament--this is typically an arched shape. Cut a small piece of felt that will serve as a backing for your feathers. Make sure this piece of felt is cut smaller than your ornament but just large enough to serve as a good base for all of your feathers. (Use step 7 photo for reference as well)
Step 6. Use hot glue and attach your feathers one by one to your felt with the front of the feathers facing you. I started with my center feather and worked my way outward making sure my spacing was even.
Step 7. Apply hot glue on the entire front side of the feathers and felt and adhere it to the center of your ornament. This is what the back of the ornament will look like.
Step 8. Place your ornament hanger back on your ball. Admire your {over half-way finished} feathered friend!
Step 9. Using a small dot of hot glue, attach your blue feather to the top of your hanger.
Step 10. Attach your grey crystals as eyes and orange bead for the beak on your ornament hanger with hot glue.
Step 11. Trim the head feather and embellish the rest of the body if you'd like. I created a simple pattern with the remainder of my grey crystals. This step is definitely optional but I loved how it turned out! Strand fishing line or an ornament hook on the hanger and you're all done!


Hang and enjoy your new feathered friend! On a lit Christmas tree she really shines!! 


signature

Friday, October 7, 2011

'50 SUCKS' Bouquet Gift {Tutorial}

Need an idea for a cute, personalized, playful and do-it-yourself gift? Try one of these sucker bouquets! I found Denise's bouquets that she's made for a few different occasions on Pinterest and have been itching to make one ever since. My aunt recently turned 50 and I knew it would be the perfect time to create one of these beauties!! Meet the '50 SUCKS' bouquet:


Only a few supplies are needed for this project and it's a fairly simple assembly!

All of my supplies were purchased from the $1 store:
Glass vase with flared rim
*Styrofoam (ball shape is preferred)
*Suckers
Hot glue
Embellishments (optional) 
I created a '50 SUCKS' flower tag with scrapbook paper attached to a skewer and used silk florals that I already had on hand

*The size of your styrofoam ball will determine the amount of suckers you will need. I ended up using a little over 50 suckers also using the flowers and smaller suckers to fill in gaps. The widest part of your styrofoam ball should be a little larger than the circumference of the rim of your vase. You're typically safe with about 50 - 70 suckers.


Directions: Fill your vase first--for weight and aesthetic purposes. I chose to use a few lollipops. Cut your styrofoam ball in half and press it down onto the rim of the vase with a little hot glue on the edge to keep it secure. All that's left is to start adding your suckers! I assembled mine in rows, working with the bigger suckers on the bottom moving my way up--and adding the smaller ones last to fill the gaps. If you don't plan to eat the suckers in the near future, you can use hot glue to really secure them--I chose not to do this. I added my sign to the top, used a few orange silk flowers to fill bigger gaps and help with the shape of the arrangement, and used the leaves from the flowers at the bottom of the bouquet to give it a more 'floral' look.


If using a glass/clear vase, note that pieces of styrofoam will fall into the bottom of your jar while creating your bouquet. If you want to avoid seeing this, use either a colored vase or any other type of container/jar that isn't see-through. Since my lollipops had white sticks the small bits of styrofoam were hardly noticed.

Denise has a small video tutorial on how she makes her arrangements; you'll notice that I made mine quite differently and I'm sure there are many variations you can come up with based on your supplies on hand and the size of bouquet you want to achieve!

Here is my aunt with her bouquet--she was over-the-top excited for it and everyone got a kick out of it!


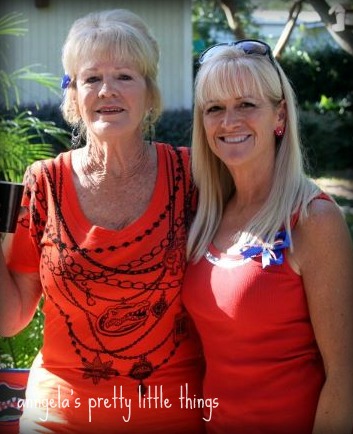
To celebrate my aunt's 50th birthday we got a lot of our family together and had one big party. The celebration was in part a Gator party as well since it was game day and my family are huge fans. What better way to dress up for a sports team than with hair bows? I made enough hair accessories for all the girls to represent the orange & blue!


Over time I have found that satin ribbon works best for the base of creating simple bows; both sides are the same color, it is easy to work with and makes the perfect bow shape without a lot of effort! Add a few smaller contrasting ribbon bows, a center embellishment and a clip to the back and you're all set! 
Here are a few of us girls on the big day:

Kim with her hair bow and Gator gear
Tia wore a headband and my aunt pinned one to her tank


My nana even had a clip in her hair :)

  The sucker boquet and ribbons were a huge hit at the party! I can't wait for the next opportunity to make another bouquet as it was a fun, quick and simple project. Who's birthday is next?? :) :)


signature


Tuesday, August 9, 2011

Handmade Wedding Gift {DIY}

Two of our very good friends got married this past weekend and I wanted to make something special for them--something handmade and personal. They're the same friends who Larry and I made this 'nap time door sign' for and I knew they would appreciate something handmade. I toyed around with a few different ideas; some of which I will probably do for Christmas, but ultimately decided upon a hand-painted canvas with a print of their wedding vows. A few days before the wedding, I barely got my hands on the entire script to their wedding ceremony (thanks to the bride's sister and wedding planner) which created a dilemma as to what part of the ceremony I would use. Larry and I ultimately decided on the 'blessing' script in place of using their vows. It describes a marriage beautifully and it's as if we are extending that blessing to them onward from past their ceremony and wedding day.

It was a tedious process, there were lots of changes and I encountered a few bumps in creating her along the way, but ultimately it turned out beautifully! 


I started off sketching free-hand a simple damask print on the left side of the canvas. My original idea was to include their last name as well on the canvas but the blessing script we chose to use was a little larger than their vows so we didn't have enough room.


Multiple layers of paint when onto this canvas--at least two of the lighter gold for the damask print and two of the antique gold for the canvas surface. It took much time and patience, but it was worth the labor!


I printed the blessing script onto cardstock, adhered it to a specialty glitter paper and off-centered it to the damask print. I added two beautiful butterflies--something that is very meaningful and symbolic to the bride.


In addition to their canvas and a gift off their registry, I created two 'Newlyweds Night Out' Babysitting Passes. They have an adorable {almost} 2-year old and Larry and I thought they would like a few nights to themselves as newlyweds! :)

Their wedding took place in Pembroke Pines (right near Ft. Lauderdale, FL) at the Capriccio Ristorante-- it was such a beautiful venue, so intimate and ornate and everyone had such a great time!

Larry and I with the newlyweds!

They are SUCH a sweet couple
 
Wyatt was SUCH a trooper and seemed to be having a blast at the wedding;
dancing with the girls and blowing kisses to everyone!

Ashton made such a cute and beautiful bride!

Randy was definitely a fun groom!


We wish all three of their family the best of everything for their future and hope they love their gifts!
We can't wait for them to return from their honeymoon in Jamaica!!


signature