Friday, April 29, 2011

Spring has Sprung Bib Necklace

They're being sold everywhere from Old Navy, to Anthropologie, to Etsy...these beauties are super popular right now and I have been itching to make one for months. I finally scrounged up some scrap fabric and a few jewelry supplies to make one for myself--finally, my first bib necklace!

Here are some details of the various flowers...I thought it would be perfect for spring and summertime to do a variety of different styles and sizes. I made the majority of the flowers into rosettes and had two additional burnt petal flowers. I also added a few pearls, lace, some other floral embellishments, pearl trim and some ribbon for that extra detail. I used contrasting (but complimentary) colors for all the different flowers so that I could be sure to wear it with multiple outfits.

And here she is...


I know she seems pretty big and has a lot going on--but that's the point, right? I wore her for Easter with a simple blue linen dress and yellow cardigan. She also looks fab with any solid color shirt or tank. The key is to wear something low-key so that the necklace will really liven up the outfit!


I love her and all her glory...each little flower handmade with love <3

Thank you Tammy from She Wears Flowers
Krista from Thar She Sews 
Chiara from Calico and Cupcakes 
and Katie from Sew Woodsy
for featuring my necklace!

signature 

Tuesday, April 26, 2011

Easter Fun :)

Has anyone seen the Easter Rice Krispies commercial? The one with the mom and her two kids making Easter egg shaped rice krispies with the M&M's on the inside as their surprise treat? Well, thinking that these 'Hidden Surprise Easter Egg Treats' would be somewhat as simple to make as the commercial made it seem, Larry's mother and grandmother wanted to attempt this...warning: this is not as simple as it looks!

Here are all the goodies we started off with...the essentials: Rice Krispies, marshmallows and butter...along with our fun "hidden treasure" candy as well as icing, dipping chocolate and sprinkles!


First step, melting down the marshmallows...After this it gets nothing but messy!


Though we were having fun, mom, grandma and I weren't having too much luck with molding these krispie eggs, so Larry stepped in... 


 Larry was apparently the professional as he had the idea that seemed to work the best!
The trick is to try and let them cool/dry IN the plastic eggs for as long as you can to keep the shape, NOT to remove them like the directions call for. The only problem with this is that it takes up a LOT of your plastic eggs!


 All the different size eggs we used!


  The krispies seemed to be holding well at first when we took them out of the eggs...then as they slowly dried some of them slowly fell apart haha

This is one of the few that managed to keep shape! :)


 This is one of the eggs that DIDN'T keep shape...mom turned it into a Peep home.:)


 Eventually we just made cupcake krispies! Yum!


 Beware: you will have lots of plastic eggs to clean!!


 The following evening once they were completely cooled and dried we got to decorating. 
Make sure your pup doesn't help like Bailey tried to do!  


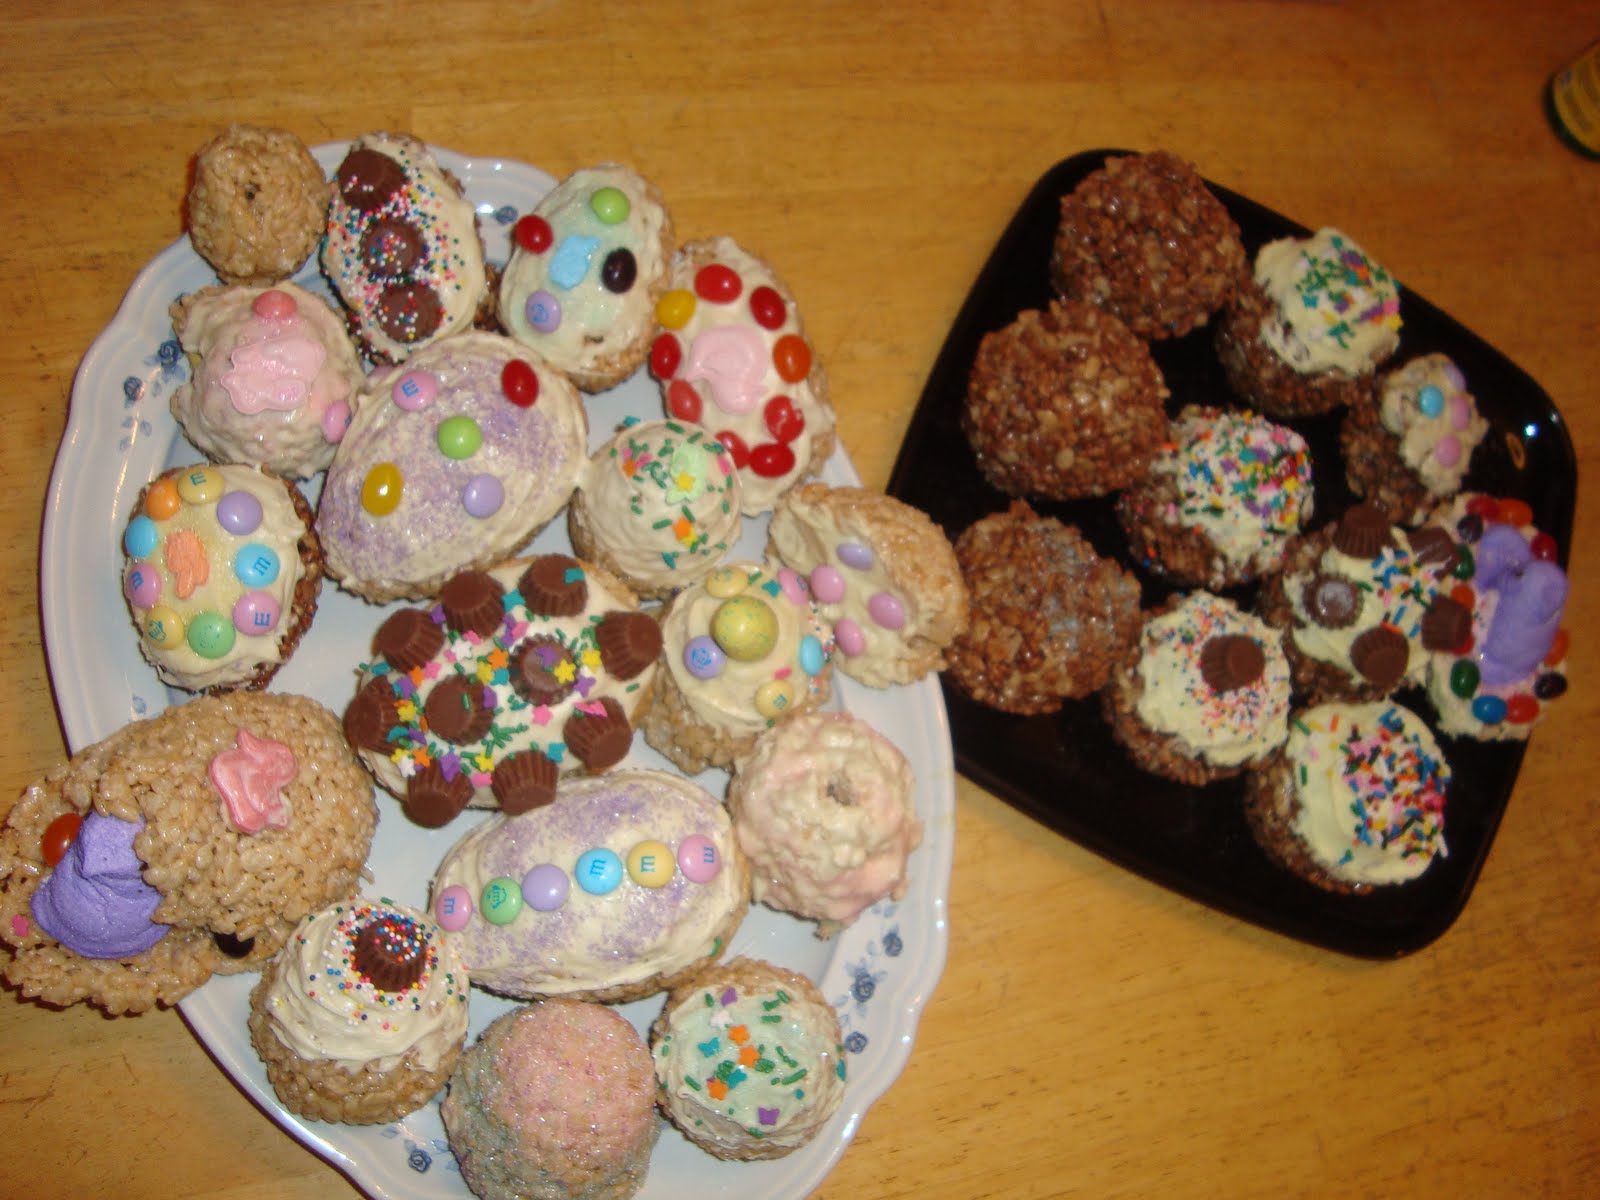
 Melted chocolate, icing, sprinkles, Reeses minis, jellybeans, skittles, M&M's, Peeps and more!


 These are some sweet treats!


 Though they were a task, they were fun to make and turned out super cute!


Once we got home EARLY Easter morning we were greeted with our Easter goodies on our bed from Larry's mom, as she puts a basket together for us every year. Instead of baskets this year, she used what she had on hand--butter containers! We had a little note waiting for us when we got home that night--it was so sweet. I proceeded to eat a few candies at 1:30am. :)


John and Ashley with their Easter baskets
 
Larry and I's Easter baskets

For lunch on Easter we went to my grandmothers and ate on the back porch. It was a gorgeous day and it was so nice to spend quality time with my family for a few hours.

For dinner we ate with Larry's family. That meant round 2 of amazing food as well as taste testing our krispie treats which were YUMMY! This was an amazing Easter and I'm so grateful to have two amazing families.


signature

Monday, April 25, 2011

Easy Ribbon Headband {Mini Tutorial}

I am a huge fan of headbands and DIY-ing hair accessories, so when my friend Ashley told me about a headband project she wanted to attempt and asked if I wanted to join, I jumped on board. We went shopping together (at Hobby Lobby as well as through grandma's craft supply goodness, which is always the best!) and picked up all the necessities. We made our headbands on our own time but each had success and they turned out super cute! This is such an easy and quick project and for some people, all the supplies may already be on hand! The basic supplies you need are:

Ribbon (at least an inch wide)
Velvet ribbon (same width as your original ribbon or thinner)
Thin elastic
Sewing machine and essentials


Ashley already did a post on her headband with a simple to follow tutorial so no need to repeat--go here to check it out. Another good friend of mine, Katie from Sew Woodsy, did a similar take on this headband last month--she made hers out of a towel to be used as a "sweatband" when working out--how cool! 

Ashley's headband for running and Katie's "sweatband" for working out

Here was my first headband.


Pink, ruffly, girly...so me. :)


My second headband I made was for Christmas time.


Plaid...red, green and gold...and I attached a bow. :)

Get creative! There are oodles of ribbon options out there--you could also add a flower,
bow or brooch to spice it up! :)
signature

Tuesday, April 12, 2011

The Interchangeable Rosette {Mini Tutorial}

One of my most favorite accessories that I am currently addicted to is the fabric rosettes and flowers. Any style, shape, size or color. They are so easy to make and add the perfect girly touch to any outfit! I started off making my first fabric flower to match one of my elastic waistband skirts. I made this one by cutting various sized circles from my fabric. I then ran a short loose stitch in the center of each to gather the fabric and then layered them on top of eachother, securing it with a button in the center. I added a piece of felt with two slits in it to the back where I can switch out between a hair clip or safety pin. 


One of the next fabric flower styles that I attempted was from the ruffle shirt by Tea Rose Home on my grey ruffled tank. These are made by creating a ruffle in your fabric, folding it in half and rolling it into itself, sewing it together along the way. I have since used this method the most often to create other brooches and accessories to outfits. 


My most recent endeavour was to make the rosette. I have been wanting to create a bib necklace, headband, bracelet or anything of the sort to get that vintagy, girlie feel from these beauties. There are MANY tutorials out there on how to make these flowers, but this one here from Little Birdie Secrets is perfect (I sometimes use hot glue in place of fabric glue which works JUST as good). Little Birdie Secrets also has an amazing post on rosettes and the MANY things you can create with them. Her genius idea of making these accessories removeable/interchangeable is awesome! Since I had no velcro on hand (or that I could find!) I simply used a second piece of felt on top of the original and adhered it with hot glue on only two edges of the circle--this creates a "tunnel" to slide a headband, bracelet or hair clip in. Now you can use the SAME rosette for your hair, a headband, bracelet, pin or anywhere you can think of! :)


My first interchangeable rosettes consisted of a larger one from a shinier black material and two smaller ones from the scraps of an old black t-shirt; all three finished off with a white pearl center. They look great all together, paired up or by themself.


Here they are paired on a headband, a single one on a strip of lace around my wrist, 
and two variations slid onto a clasp bracelet.


I can't wait to make more and play around with multiple colors! :)


signature